Modern visual effects are a blend of many different tools, technologies, and artistries. But when it comes to compositing something behind a live-action character without a green screen, removing rigs or wires, recoloring one item in a frame, or converting an entire movie to stereo 3D, the tool of choice is the invisible art of rotoscoping. Today's powerful spline-based roto software and highly-skilled artists are the glue that binds more visual effects shots together than most realize and is perhaps the most widely-used practice in visual effects. This article explores the essential role of roto in modern filmmaking and offers best practice tips shared by four world-class roto artists. We will then cast our steely gaze into the future of roto to see if Artificial Intelligence will end our jobs or expand on them. The answer might surprise you.
Roto is so critical that many modern visual effects would simply be impossible without it. Josh Barham, a Paint and Roto Lead at Framestore (Wonder Woman 1984, Avengers: Endgame), puts it even more succinctly, “You really can’t make a movie without roto.” The talented roto artists of today play a key role in modern filmmaking that will continue into the foreseeable future. While roto has a bright future, few are familiar with its deep historical roots which go back long before B-splines and bicubic interpolation.
The History of Roto
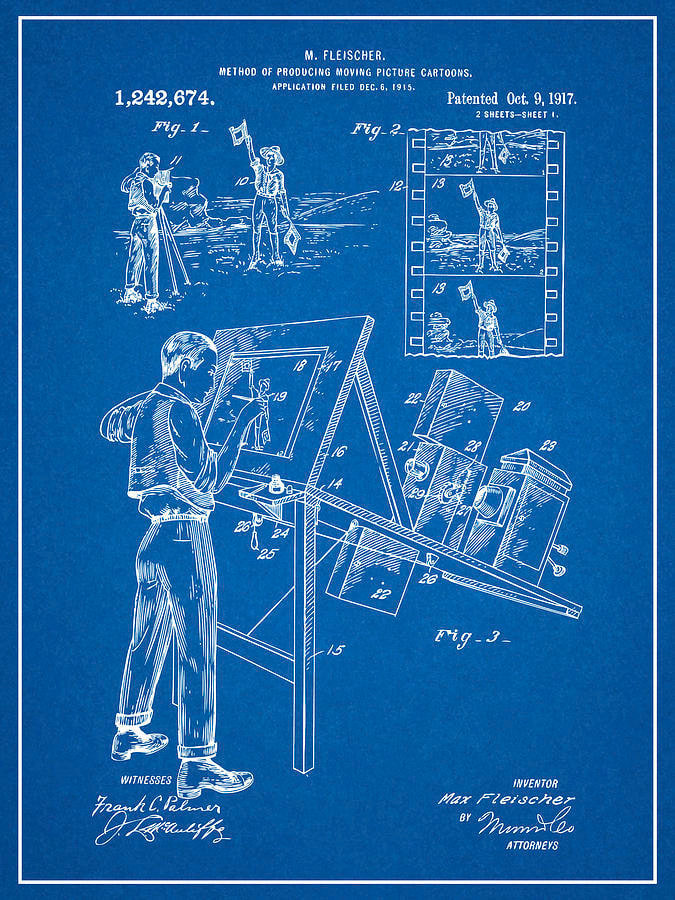
The art of roto has a noble history extending back well over 100 years. Its origins lie in the early 1900's attempts at animation. Lacking any kind of formal training, early animation came off twitchy and chronically off-model. To address this problem, Max Fleischer patented his Rotoscope device (in 1915) that rear-projected one frame of film at a time on a workstation so that an artist could trace an actor on paper. The paper tracings were then transferred to cells that would be inked, painted, and filmed one frame at a time.
With its early history established as an animation assist, Roto 2.0 arrived in the '40s when it was adopted for film effects. Initially given modest roles like wire removal, Disney first put it to full-body use in Song of the South (1946) to combine live-action characters with animation. By the '60s it was being used for full-up effects shots like Hitchcock's iconic The Birds (1963) and famously, the lightsabers of Star Wars (1977).
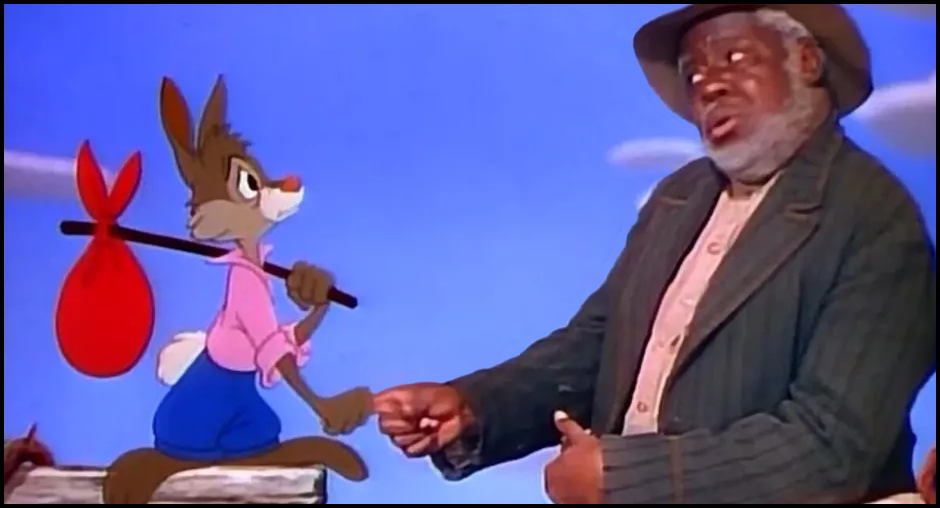
“The Song of the South” (1946)
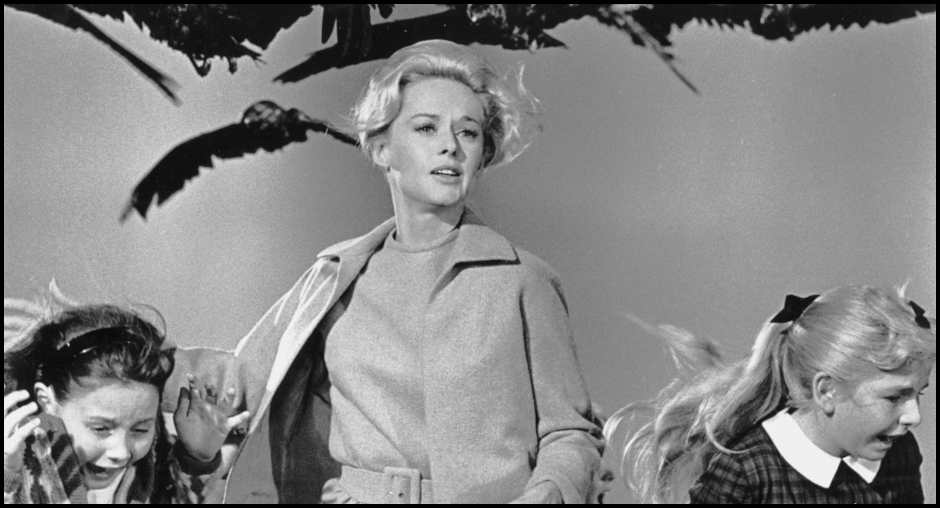
“The Birds” (1963)
However, its early uses were severely limited due to the time-consuming process of drawing frame-by-frame on paper. One obvious problem with it was that each frame had to be re-drawn from scratch, gaining no benefit from having drawn a very similar previous frame.
One could say that Roto 3.0 began in the mid-80s through the early ’90s with the explosion of CGI software that introduced computer-driven animation and keyframing. While the early focus was 3D animation, by the 90’s multiple software companies, including Quantel (Paintbox), Parallax (Matador), Cosa (After Effects), and Elastic Reality, were developing tools for animating paint — and more importantly, splines to cut out objects. Now CGI could be blended with live-action and backgrounds could be replaced without greenscreen keying.
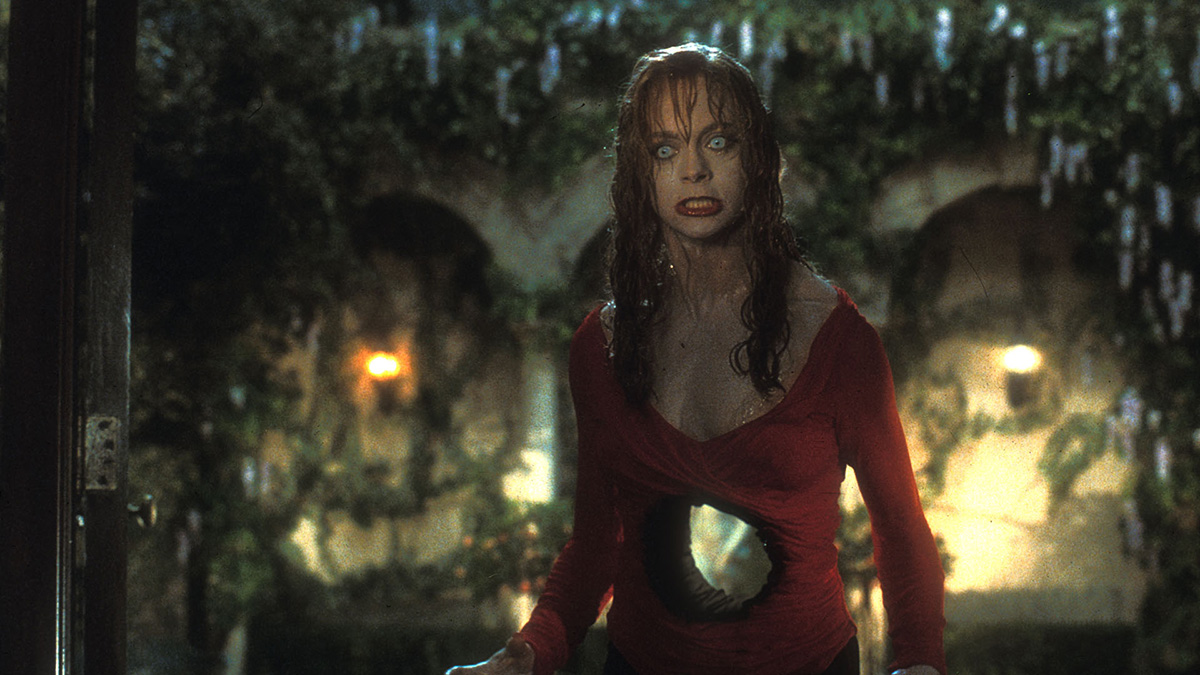
Industrial Light & Magic used Matador for roto work on “Death Becomes Her” (1992)
More innovation came when Bob Sabiston, animator/computer scientist, developed a roto-paint software called Rotoshop (a play on Photoshop) for proprietary in-house use. This allowed a vector drawing to be copied then keyframed to create the next drawing, which produced dramatic speed gains from the old-fashioned tracing techniques. While never released commercially, Rotoshop’s usage on influential animated films (Waking Life and A Scanner Darkly) surely played a role in subsequent roto innovations.
Rotoshop used on Richard Linklater’s “Waking Life” (2001)
Roto 4.0 began in the early 2000s when VFX artists Marco Paolini and Paul Miller (former Elastic Reality developer) noticed that there was no single commercial application that focused totally on the roto process. The two collaborated to produce what would become Silhouette, a dedicated roto and paint application that made its debut in 2005. Around the same time, UK-based Imagineer Systems was developing what would become the Mocha planar tracking system. In the following years, specialized roto and masking tools have become standard features on almost all commercial effects and editing software. Still, Silhouette and Mocha Pro are the tools of choice for professional roto teams with advanced features like linked planar tracking, X-splines, individual control point feathering, automatic motion blur, sophisticated layer management, and much more. Integrated planar tracking as a roto assistant, coupled with advanced tools for shape editing and keyframes provides major productivity and consistency gains necessary to scale roto workflows into an industry. In fact, many VFX facilities and independent companies worldwide now offer roto as a commodity service.
The Role of Roto in VFX
Simply put, a roto is necessary whenever an element in a shot needs to be isolated for any reason whatsoever — to composite something behind it, receive a different color correction, prep a stereo shot, rescue a poorly lit green screen, or perform a rig or wire removal — for anything that needs to be done to one element and not the rest of the frame. Extraction (keying) arbitrary objects in scenes is often not a viable solution. Even if successful, the keyed edges will neither look nor behave like the roto edges, so they do not mix well together.
Rotos are also useful to the in-house VFX pipeline where they can be used by the animation department as an animation guide, the lighting department to mask areas for rendering, and the paint department to mask off regions for paint. This is a very broad mandate and as a result, roto is the universal problem solver that can be used on any element — in any shot — for any purpose. Because of that power and flexibility, it is an indispensable tool for visual effects. And sometimes for the whole movie.
Jarhead (2005) represents an extreme case of roto making the movie. VFX supervisor Pablo Helman wanted to capture the movie with a freewheeling camera style which just can't be done on a blue screen stage. He made the bold decision to shoot the movie "au naturel'' and roto all of their compositing shots (of which there were many). By not shooting part of the movie on a blue screen stage he was also able to maintain a consistent look throughout. The example here shows how many soldiers and trucks had to be roto'd in order to not only lay in the smoke and fire behind them but also to comp in the black soot on the ground in front of them.
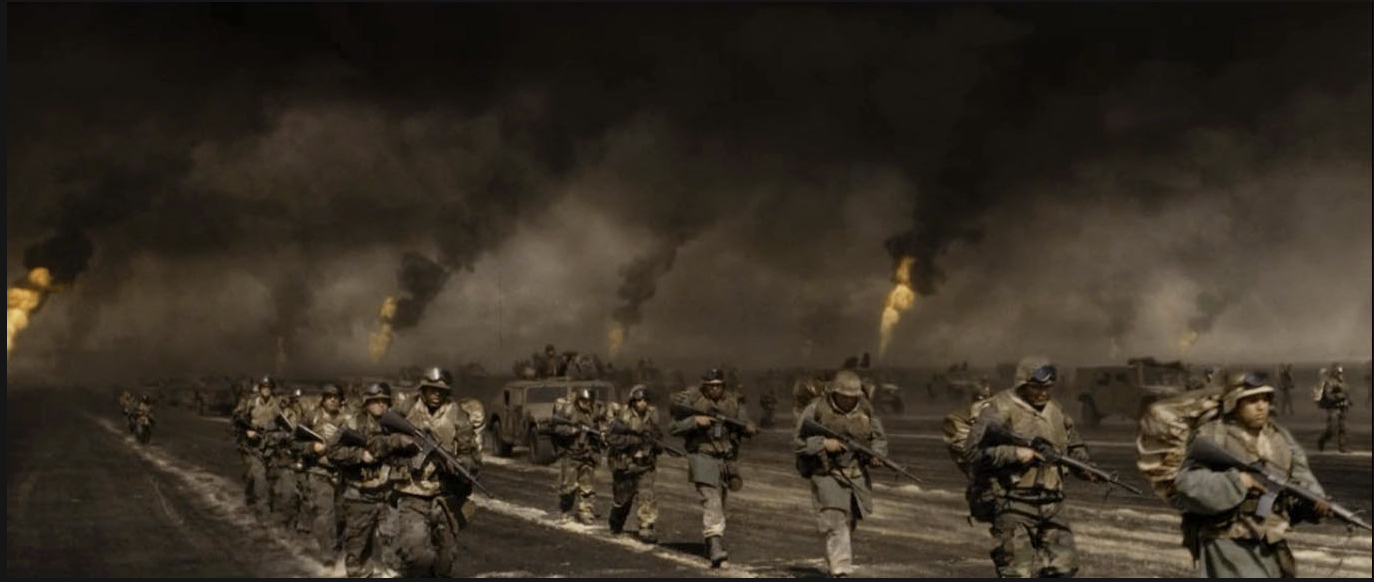
Major roto work on “Jarhead”
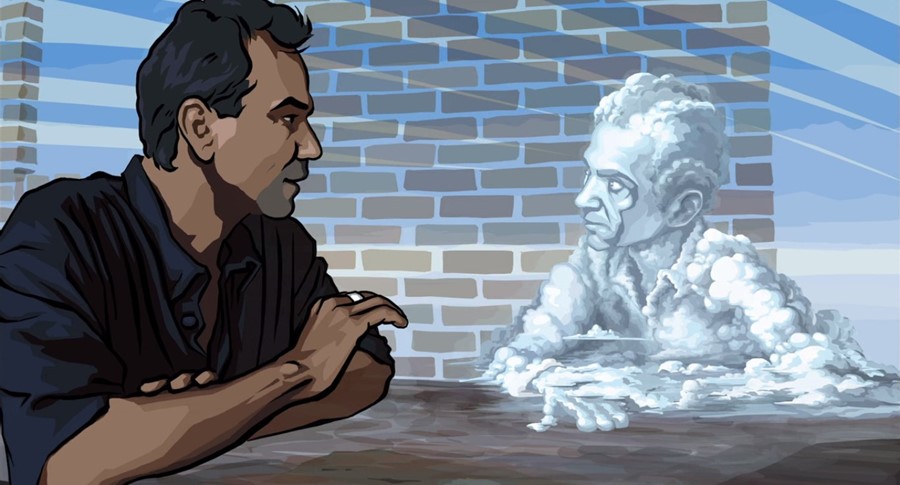
Sometimes roto doesn't make the shot but saves it. Paint/Roto supervisor Justin Graham (Minority Report, King Kong, Spiderman 3, Terminator, and others) tells this tale from Poseidon (2006): "There was a shot with several people where the lighting alternated between pitch black and a flashing light. It was decided to keep the background illuminated to silhouette the people, so to save the shot they needed to relight it using roto." He had to draw roto shapes on virtually black frames to create a mask of the foreground characters where there was simply no image content. It became an animation task. Compositors then used the rotos to completely relight the background with the rotos providing the silhouette of the people in the dark.
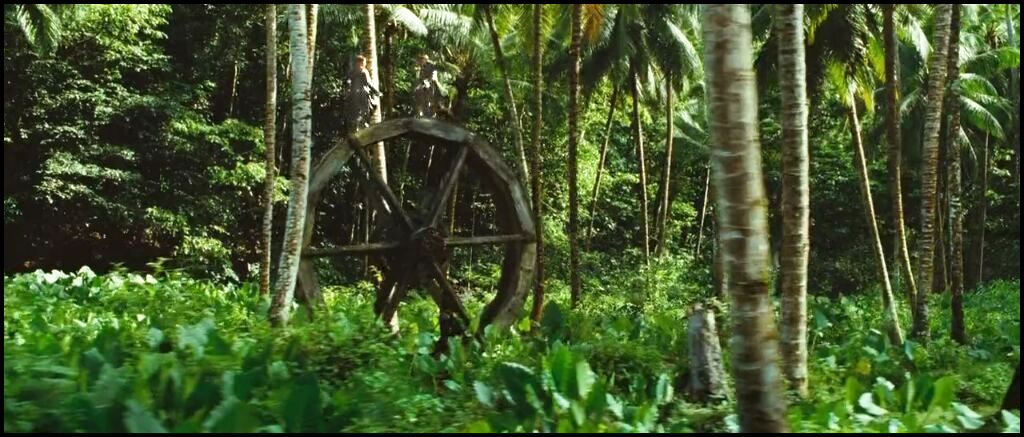
Massive roto went into “Pirates of the Caribbean: Dead Man's Chest”
The epic water wheel sword fight sequence in Pirates of the Caribbean: Dead Man's Chest required a roto effort that stunned even senior paint and roto artist Huey Carroll. He has 14 years of paint and roto experience on a long list of blockbusters including Hunger Games, Maze Runner, Star Trek, Terminator, Captain America, Pirates, and many others — but never saw anything like this. To capture the forest foliage interacting with the passing water wheel they shot an equal-sized blue metal drum rolling through the forest that would later be replaced by a CG water wheel. But for that to happen, Huey and the team had to literally roto the forest and all the leaves interacting with the drum. In another Pirates sequence, a contaminated blue screen shot of the ship had to be rescued by roto’ing hundreds of swinging ropes. As it turns out there is actually an astonishing amount of roto work done on feature films to rescue poorly lit blue and green screens!
Best Practices
Here we will look at the collective wisdom of our four roto masters to learn best practices for today's roto work. Your client is the compositor on the shot and your deliverables might be the splines, the mattes, or both. With the splines, the compositor can tweak them a bit at comp time to adjust to the details of the composite. However, the roto splines can make the compositing script "heavy" so some prefer to use rendered mattes. Rendered mattes can be tweaked with a little paint touch-up or a patch shape if needed. The entire purpose of roto is to assist compositing so make sure you are providing the kind of assistance that is needed.
Make a Plan: The starting point is always to study the shot and form a plan of action. Many set the playhead on "ping pong" to watch the clip forward and backward. Some even lower the playback frame rate to get a better view of the action. This is also a good time to think about the naming conventions and organizational breakdown of the shot. Create folders for major body parts — each thoughtfully named for what it covers — filled with shapes that are similarly named for clarity and traceability. By the time the shot is done, there could be hundreds of shapes and a disorganized database will cost time.
Object-Oriented: So how should you proceed? Pick a complete object — a hand, a head — and roto it for the entire length of the shot then go on to the next object. By staying on the same object until it is done you will "learn it" and become familiar with its movement and behavior making it faster and easier to make those informed guesses as to where that darn edge is.
Start Frame: Choosing the right frame to start on for the target object is another success secret. It should show the most detail and be the closest to the camera as possible. Each object will have its own best start frame of course.
Point Placement: Exactly where to place control points is another key decision. First, placement needs to relate to a feature and stay with that feature over the length of the shot. You do not want control points sliding up and down an edge. You also want to study its shape changes over the entire sequence to make sure you start with enough points for the whole shot because adding points later is bad form and can mess up previous frames as the spline reacts to the addition. For this reason, many like to choose the most complex frame as the start frame.
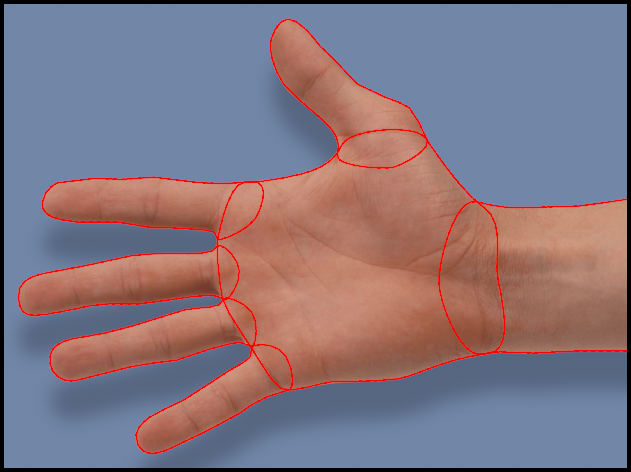
Shape Breakdown: Shape breakdown is another key skill of the roto master. Shapes should conform to the articulation of the target. For example, one shape for the palm and another for the wrist, not a single "palm-wrist" shape. The beginner invariably starts by drawing one large spline around the entire hand for example, then tweaking control points for the duration of the shot. Not only is this more time-consuming, but it results in unsteady edges. The pro breaks the hand into separate shapes and, to the degree possible, just moves (transforms) shapes without messing with control points. The pros agree — “move shapes, not points.” Control points should only be moved when the target object changes its outline.
Keyframing: Smart keyframing strategies are another secret of success. Don't just bury your head and blast forward on 2's (every other frame). Instead, stop and study the nature of the motion. You might get better results if you keyframe the first and last frames, then a middle frame, then halfway from first to the middle, and so on bifurcating (cutting in half) your way to completion. A different element in the same shot might have a completely different motion and would best be done on 2's. For moving body parts it is often a good strategy to first plant keyframes at the direction reversals like the swinging arms of a pedestrian, called keying the extremes. If the motion doesn't reverse then look for where the velocity or path of motion changes to plant a keyframe. Then go for the in-betweens, perhaps with the bifurcation strategy.
Tracking: One thing these roto heavies all agreed upon was the key contribution that tracking plays for both productivity and consistency. A consistent edge aligned to the target without chatter is the overarching objective. With the target object tracked and stabilized, it becomes much easier and faster to roto. Also, fewer keyframes will be needed as the tracking transform will move the shape for much of the motion which boosts productivity. The roto artist can focus on tweaking the control points that need to be moved due to a change in the outline of the target. The naturally smooth tracking transformations along with minimal control point tweaking make for fast and consistent rotos.
Motion Blur: And don't forget the motion blur and its cousin, Depth of Field (DoF) defocus. For motion blur, the spline is laid on the solid inner core edge, maybe one pixel in depending on house rules, then motion blur processing is enabled to create an agreeable blur. For DoF defocus, you need a global feather value since the thickness of a DoF soft edge is typically uniform.
Inspection
Needless to say, you never want the compositor or the comp super to find your mistakes. You should do a 100% Q.C. inspection of every single edge on every single frame from three different points of view before anybody else sees your work. When others find your mistakes, it doesn't just besmirch your reputation, but it also disrupts the flow of the process because they will have to either send it back to you to fix or to fix it themselves.
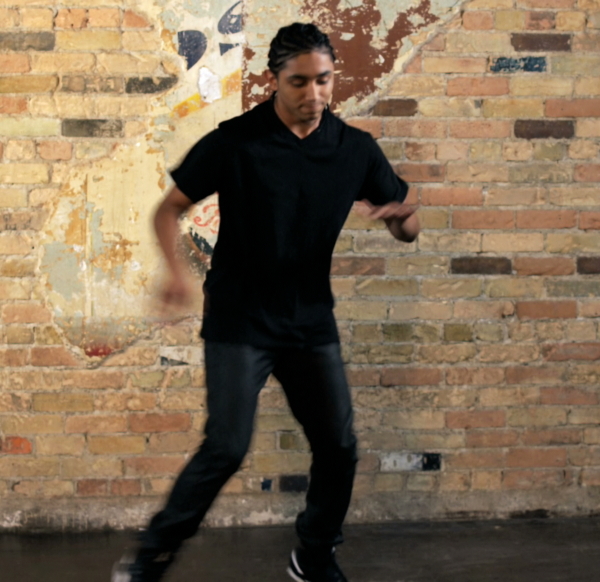 |
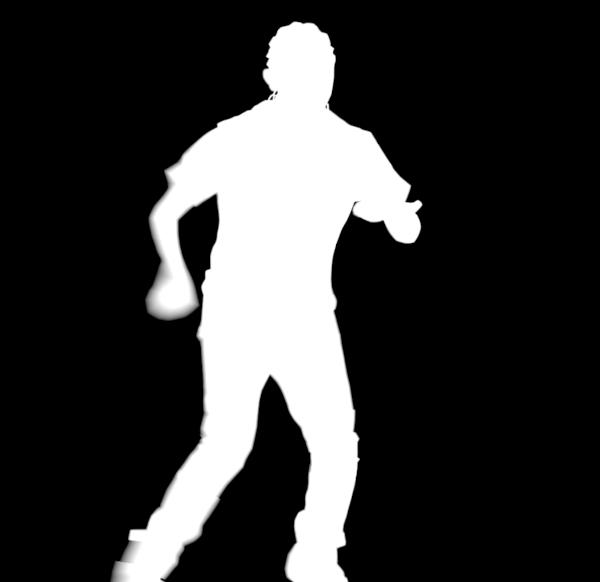 |
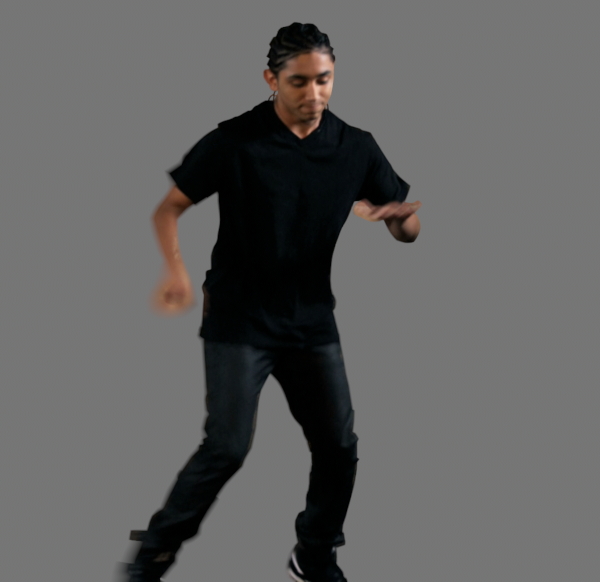 |
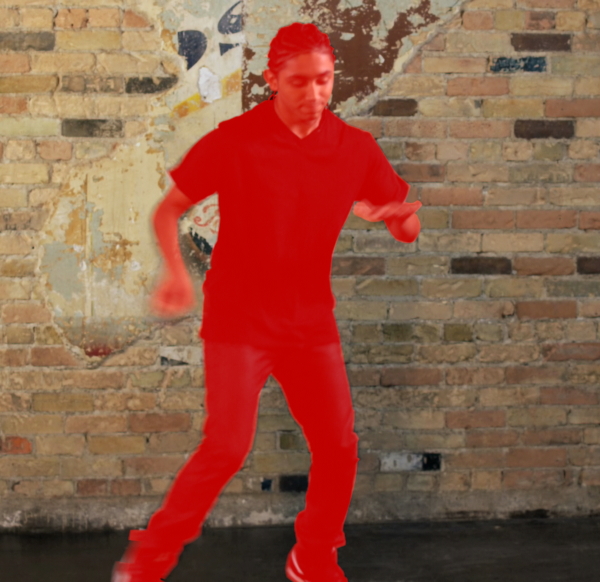 |
| original frame |
the matte |
a comp |
color overlay |
Each of these three inspection views is designed to reveal a different aspect of the work. They should also be checked at speed, at slow speed, and one frame at a time as different issues will be revealed at the different speeds. This may sound time-consuming, but I guarantee you that your compositor would much rather have a clean job than a problematic one that was delivered 20 minutes sooner.
Viewing the matte is the best way to spot chattering edges and check motion blur. Be sure to check for chattering edges with motion blur disabled because it can hide the chatter, then check the extent of the blur with it enabled. Also, run the contrast up and down to check for holes in the matte. Doing a comp over a neutral gray reveals where the roto is too wide, plus it provides a second check on motion blur. The color overlay reveals where the roto is too narrow. Each pass tells a different story and you need to check them all.
Who Likes to Roto?

Roto is the classic entry-level position for getting into visual effects but some studios want both roto and paint skills to get in. So are all roto artists beginners? Not at all. Some actually enjoy this type of work and decide to stay. The inspiring tale of VFX digital artist and roto master Katie Morris starts in the '90s in the art department at ILM. This was before books, courses, or classes for digital paint and roto, so she taught herself Photoshop. ILM noticed her artistic talent and put her into their roto department which had an in-house training program. She now has an astonishing list of major movie credits (Pacific Rim, Star Trek, Deep Impact, Avengers, Thor, The Mandalorian, and 60 more!) and has painted and roto'd her way to becoming a very successful VFX digital artist.
Katie is one of many senior artists that enjoy roto, so I asked our panel of experts what they found rewarding about the work. First is the perfectionist in them. Many folks find great satisfaction in achieving the elegant perfection of a well-behaved roto. The shapes line up perfectly on all edges and the matte action is clean and consistent, a perfect match to the live-action. Others like the "Zen" of the process. You settle in, focus on the mission, perhaps with headphones, and roto the day away in sublime focus. At the end of the day, you look up and it's time to go home. Others enjoy, even prefer, the individuality of the task. No one to bother you with interruptions, you work alone, and the work is entirely yours. But regardless of their special attraction to roto, they all find great satisfaction in the excitement of working on a feature film and how their friends and family will see their names scroll by in the credits.
Roto 5.0 - the Future

As we approach the end of the Roto 4.0 epoch, we find that roto software packages are rapidly adding ever more sophisticated tools to speed up the workflow. For example, Silhouette introduced inverse kinematics for rotoscoping articulated characters, magnetic splines that snap to the nearest edge, and weighted keyframes where the artist can define time ranges for an adjustment to ease in and out. All of these speed up workflows and improve quality. Mocha Pro has recently responded to VFX artists’ feature requests by introducing an astonishing new sub-planar tracking mesh that can track on flexible movable surfaces instead of just rigid ones. And both Silhouette and Mocha Pro play nicely with current industry-standard compositing software, Nuke, Fusion, and After Effects. All of this means rotoscoping software is steadily getting smarter, faster, and more capable. But how smart will it get? How smart can it get?
AI promises to revolutionize the tools and technology of rotoscoping and it will be the hallmark of Roto 5.0, the era of intelligent roto. But can those promises be kept? Rotoscoping entails the branch of AI called Computer Vision or Machine Learning, which is most famously developed for self-driving cars. That tech is applied to our work in a process called semantic segmentation where the computer recognizes objects like a person and collects all those pixels into a separate segment labeled "person." This tech has gotten quite good at recognizing objects so they can be isolated or segmented from the background.
AI can recognize and then isolate (segment) a walking human because it has an internal human model to guide it. But what about a person on crutches? Or an occluded person? Or an octopus? I think you see where I am going here. We humans can recognize and roto all these things without any special training to tell us what they are. AI will not be able to roto birds, for example, until it learns birds. And then how well it can roto a bird will depend on the quality of its bird model. But building those models is expensive and time-consuming. Let's grant that someday the knowledge bases will get huge and more complete so they will eventually be able to roto a Yeti in a snowstorm. But that is not the real hurdle for AI here.
I believe the real hurdle for AI is the edges. As you know, rotoscoping is all about the edges. Smooth edges, ragged edges, fluffy and furry edges, motion-blurred edges, defocused edges, and defocused furry edges —I could go on for pages. Even if there is no visible difference between the target and the background, we humans can still roto the impossible shot like the Poseidon story above. This is the art of roto — to consistently find that perfect edge in the midst of continuously changing scene content and to do it quickly and efficiently. But how well will a machine be able to do this?
There are already a few AI-based roto tools out there - Adobe’s Rotobrush, Rotobot, and RunwayML for example — but the most that can be said for all of them is that they can quickly generate good garbage mattes. Unfortunately, the mattes are computed on a per-frame basis so they also don't always maintain temporal consistency. And again, the difference between a garbage matte and the final matte is the edges. I'm afraid I agree with Ross Shain, Chief Product Officer for Boris FX when he says rather than try to develop a fully automated solution, he’d like to see the focus be on using AI as a roto assist to minimize repetitive tasks and increase productivity.
So what about the prospects of AI taking our roto jobs away? Not to worry, an "all AI" solution is a very long way off. The keys to roto quality and productivity are choosing the right start frame, the choice of shape breakdowns, the placement of control points, and the selection of keyframe strategies. These are all very shot-dependent and require a great deal of experience to get right, so they will remain elusive to AI for many years to come, perhaps even permanently.
What we will see is AI contributing around the margins with productivity tools, but I believe roto will still be an artist-driven process. Industry experts point out that the demand for roto is actually increasing for two reasons. First, there is a steady increase in the use of visual effects in movies and TV shows overall. Second, the new virtual stages with their LED panels actually need a great deal of roto for finishing. And there will always be badly lit green screen shots to rescue. Regardless of the direction of the technological evolution of visual effects, there will always be a need to isolate elements for special treatment. This guarantees that there will be plenty of jobs for artists that are skilled in the invisible art of roto.